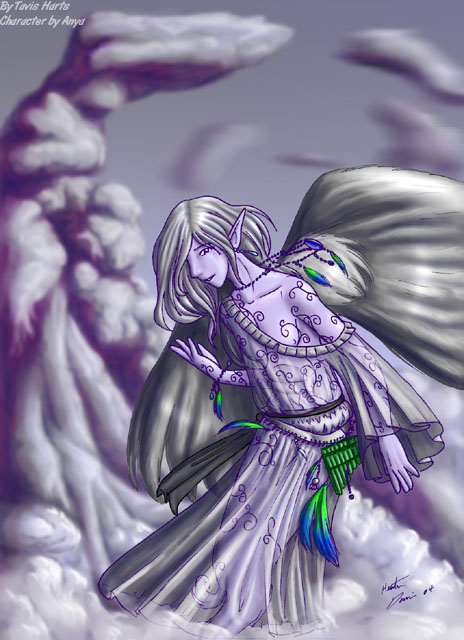
 I
Was asked to do a tutorial on coloring so here is one of them. ^^ I have a few
other methods of coloring so expect to see a tutorial on those as well.
 I
Was asked to do a tutorial on coloring so here is one of them. ^^ I have a few
other methods of coloring so expect to see a tutorial on those as well.
This tutorial is for the very visually oriented XD. So if you are on a slow connection I am sorry. This page may take a while to load.
This is the picture for this demo. Its sosiqui's little
fae ^^ Riven
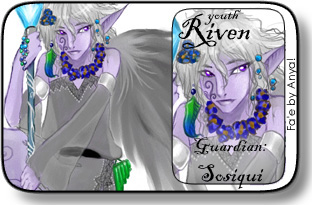 The fae was made by Anya :3 Here is a link to her website.
Ok ^^ now that introductions are over.. time for the tutorial.
Step one.... Cleaning the lineart.
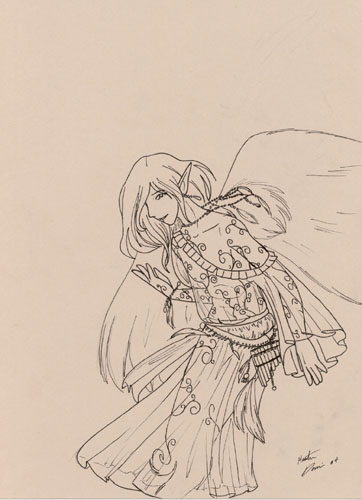 |
As you can see this lineart would not
be easy to photoshop. What you do to clean this up is simple. Go to layer/newlayeradjustment
and then select brightness/contrast. When you move the contrast to a higher
setting it cleans the lineart up for you.
If your lineart still seems to have too much of a color to it or doesn't look right go back to layer/newlayeradjustment and then go to hue/saturation Adjust the saturation or hue until the lines are what you want. After that simple go to layer and then merge visible. All the layers will combine into one lineart layer. |
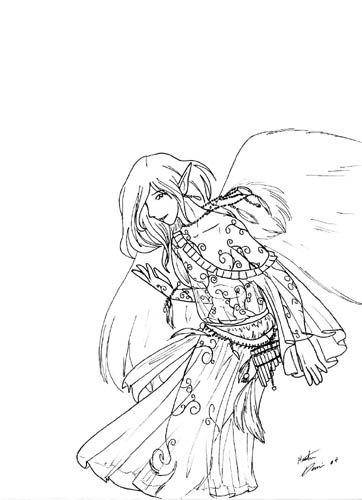 |
Next The trick is how to adjust the layer so that ONLY the lineart remains. The tool for this is under filter in photoshop 7, In other photoshops it maybe somewhere else. But in any event look for something called "EXTRACT..."
This is a wonderful wonderful tool. Make sure that you are on the layer with the lineart (I am not fully sure why there would be multiple layers yet.. but just incase.) Then go to Extract. Another window will appear ontop of photoshop. With the highlighter/brush color over ALL the lineart. (any lineart you miss will be discarded by this.. so be sure you get it ALL) http://tavisharts.kamiki.net/tutorials/riven/tutoriala1.jpg <- you will get something like this afterwards. Choose to make it into the forground and select the color the lineart mostly is in the "extract" bar. When you click on it you get a color pallet and a eyedroper. Simply move the eyedropper over the lineart and it should tell you about what color is there. Most linearts all you have to do is tell it to extract black. (Near the color thing, there is a box that says "force forground." (see reference link in this paragraph) I am not sure if it is 100% necessary to click on but it might very well be. So be sure to check it.)
Note: if your lineart is... green or something and you tell it to extract black, all that is going to happen is that it extracts as much black as it can from it and you will get a very bad version of your lineart. If you fear that your lineart is not truly black or gray scale simple go to layer/newlayeradjustment/ hue/saturation and move the saturation to 0. This will make your image completely gray scale :3.
Question: "what if my lineart has shading?"
That is fine. Simply tell the extract to extract black. :3 all gray scale will simply show up as different opagancy's of black.. making it really easy to color underneath them.
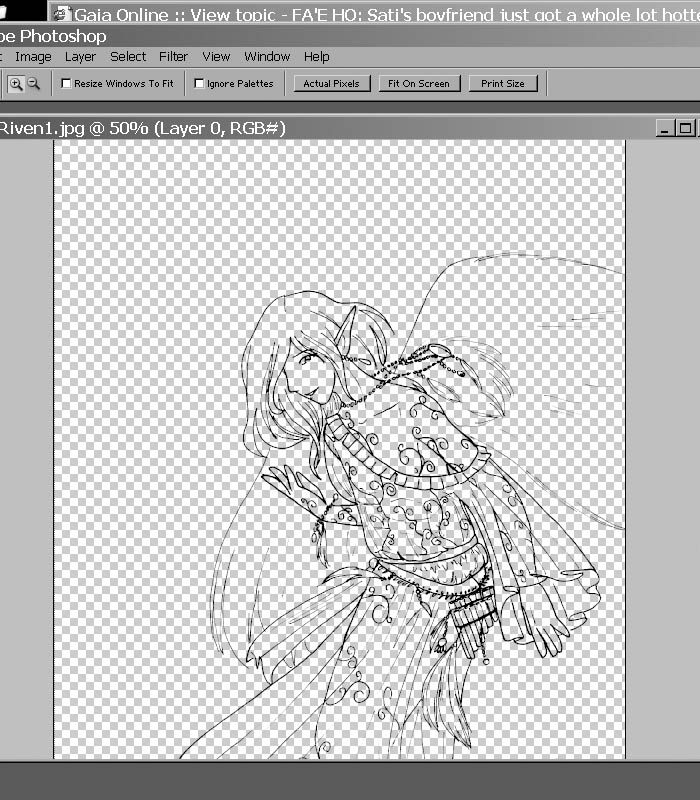 <- after extract you will end up with something like this.
Part3.. actual coloring:
Photoshop has layers :3 make use of them. Be sure to surf between them and experiment with what they can do. It will pay off. I assure you.
Now then... What I am going to show you is the coloring style I used for this picture. There's several different ways you can approach coloring in photoshop ( I will try to show other ways later) So if this method doesn't work for you simply try other ways :3 (note: the cloud part of this coloring as well as the wings requires a different sort of coloring than the rest of the body. If you want it is something you can experiment with.)
On a layer underneath the lineart layer create a new layer and color a part of your picture (such as the skin). Generally when I am coloring I have the different parts of an outfit on their own layer. It makes coloring them easier as well as easier to fix. What I started with was three layers under lineart. One for the general colors of the background, one for skin, and one for hair.
|
|
|
After this focus your attention on one of the layers. Go to the layer screen in photoshop and "lock" the layer.
Locking layers: it is shown by a three by three checkerboard symbol (sort of resembles the nothing there checkerboard look that you had earleir). To lock a layer simply click on the layer in that mini window then check the box by that three by three square (or the square itself depending on the program addition). The effects of this is quite fun.
Pros: It prevents you from coloring outside the lines. :3 You can be as sloppy as you want and never have to worry.
cons: You can't move the layer or color outside of
areas that have already been color. Or truly erase any of the parts that have
been already colored. To fix this simply go to the layer miniscreen and unckeck
the lock box. :3
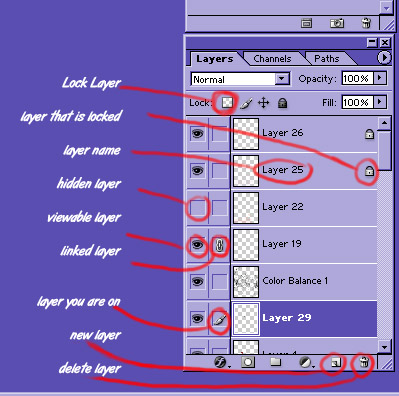 <-
this diagram may be useful in the future for different things I reference with
the layer window ~.^
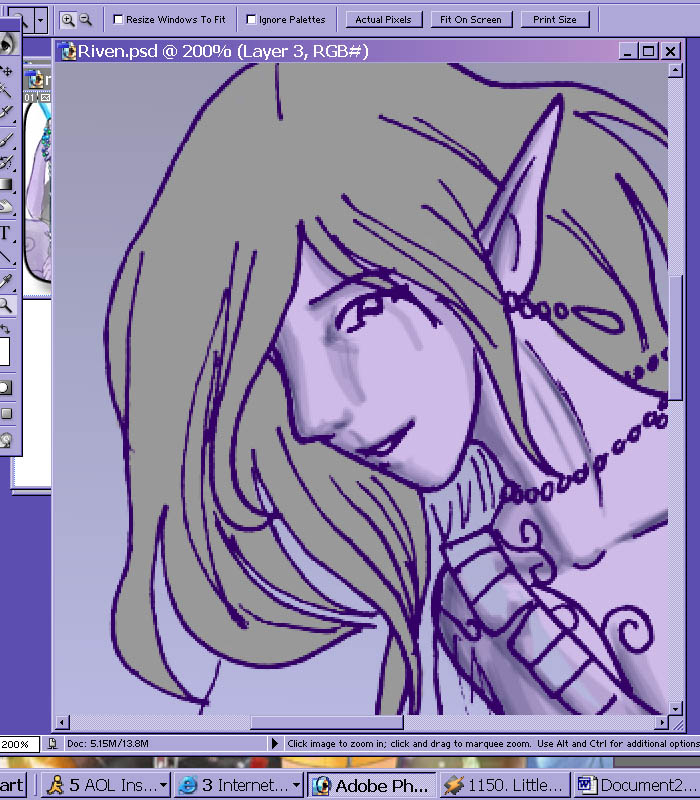 |
Now that mister layer is nice and locked we
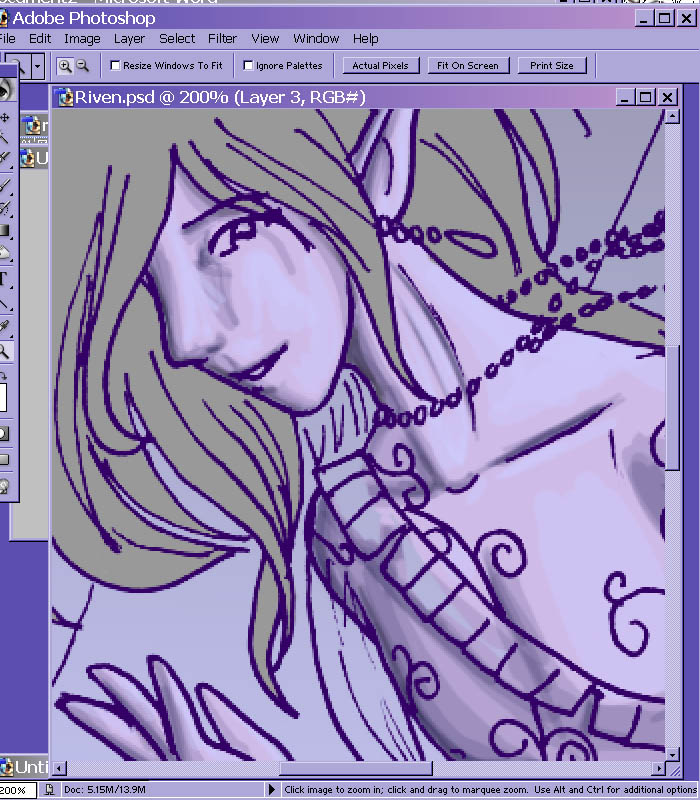
start to work on shading and highlights. Start by laying down your shadows.
Be sure to put the shadows where you want them :3 And don't forget about
Dropped shadows (Shadows caused by something above the object.) In this case
Riven's hair provides a few of these.
Also note. when working with shadows DON"T JUST USE BLACK OR THE BURN TOOL EXCLUSIVELY \o.o/! If you want your picture to be colorful try to find other colors that are in shadows. This could be purple, red, green, blue, brown, ect. And if you want to you can have more than one color in the shadows. Now I am not saying that black or the Burn tool should be avoided. By all means use them. :3 They add a lot of richness to a picture. However, try not to just use them as your ONLY method of shading. Use them to make the shadows richer or darker :3. In this picture the shadows were a dark blue. |
 |
Tip for shading: try to have your brush strokes go in the same direction of the object you are shading. If your object is a ball be sure to shade along that curve. :3
Also for me I generally choose a dark color then go to the brush opagancy and adjust it to about 10%-20% :3 This allows you to control how much color is in that area and you can go over an area more than once to create deeper shadows.
Highlights:
 |
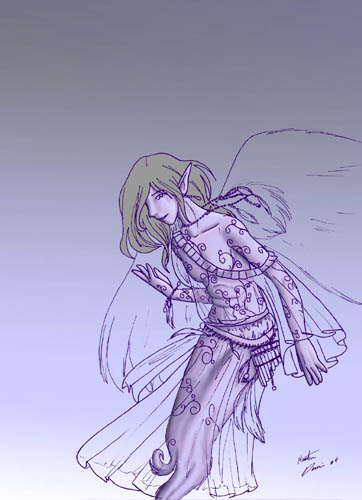
Now comes the fun part. Try to remember how
many different layers of shadows you made. 1? 2? 3? well. for that many
levels of shadows you have to create just that many layers of highlights.
Some colors I have seen appear for highlights have been yellow, pink, and gray. (there are others so don't feel that this is the final say on what all skin highlights can be XD.) In this picture the first skin highlight was a light blue. Feel free to use white and dodge much like you did for the shadows mentioned earlier. :3 Don't make them your main method of highlighting but do feel free to use them. |
 |
Question: Is there any case in which I can use just black for the shadows and just white for the highlights according to this?
Yes, you can use those if you like. Just keep in mind that it will make your picture look a little unsaturated XP. Having other colors in those shadows and highlights makes the image looks extremely vibrant. :3
Question: is there ever a case in which the object has more highlights than shadows or more shadows than highlights?
Yes. :3 Be sure to study some of the textures of some of the objects you would like to present in your picture. A safe way to do it however is assume that they have about the same # of highlights as shadows.
Smoothing out the image.
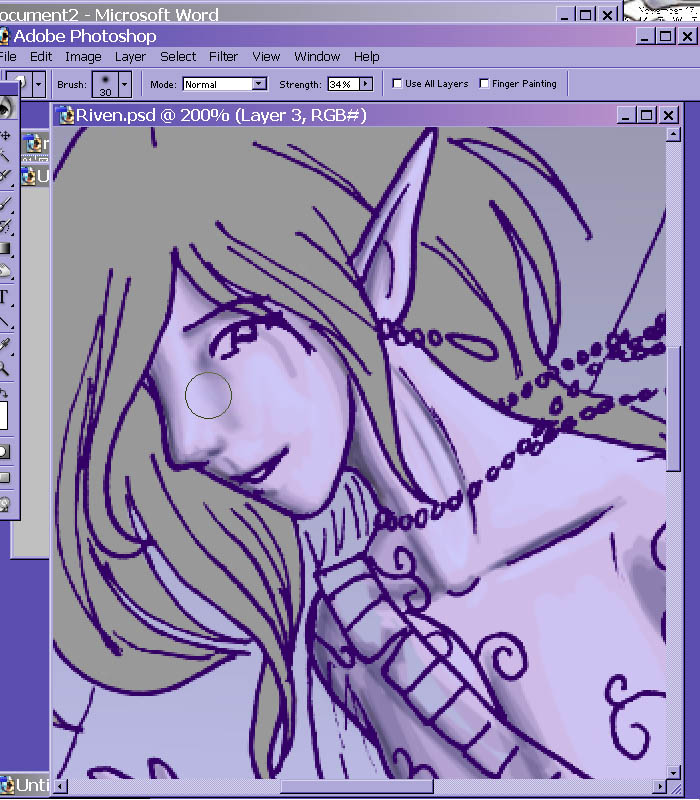 |
This tool I use a lot for this method of
coloring. Some artists don't like the look it provides. :3 That is ok.
Simply go with what you want or looks good to you.
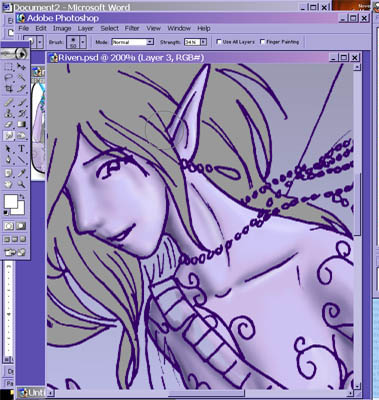
However I enjoy smoothing out the image with the smudge tool. :3 When you use it be sure pull the shadows with the shape of the image you are coloring. :3 If the image you are smudging is curved pull the shadows and highlights along that curve. After this I messed a bit with dodge and burn. Note for dogde and burn: Whatever setting you have it at effects what the highlight or shadow will look like or what part gets the most attention. :3 Highlight will force it to pay attention exclusivly to the areas that are closest to white while leaving other areas alone. Be sure to use this to your advantage. |
 |
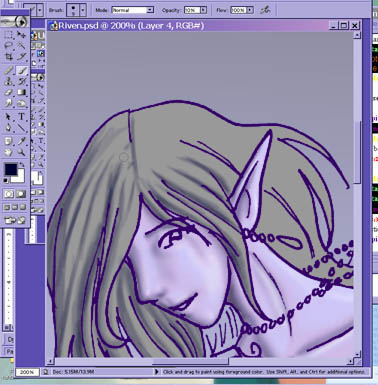 |
For the hair:
again start with the shadows and be sure to move your brush the same direction as the hair is moving. |
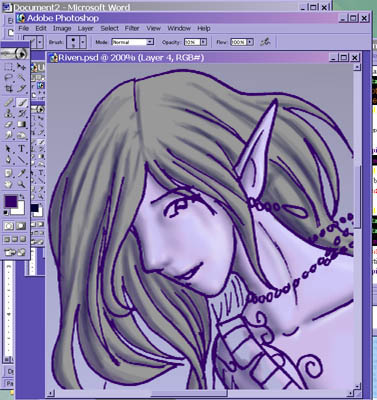 |
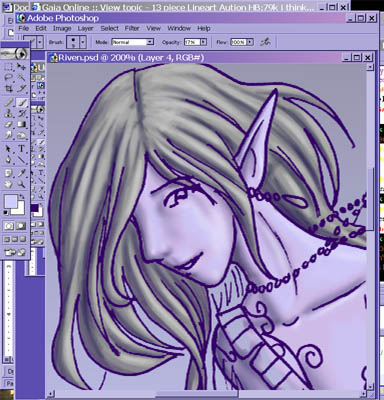 |
Same applies for highlights. XP In this I also added a shadow of purple and an additional highlight of light blue.
|
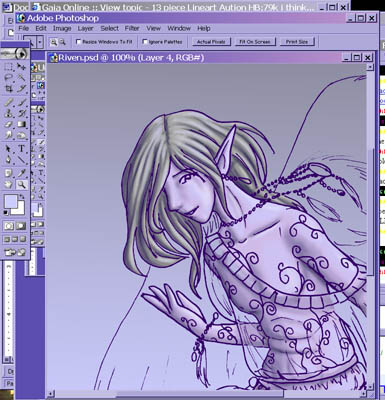 |
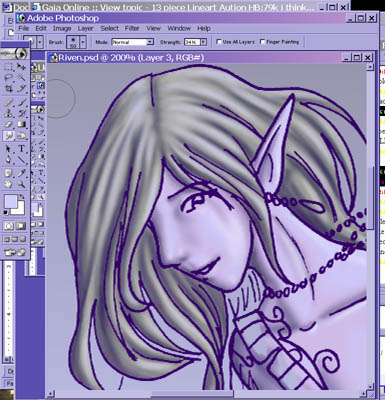 |
Smudge the hair :3
I added an additional highlight in just a few tiny areas to make the hair look overly shiny. In this picture. |
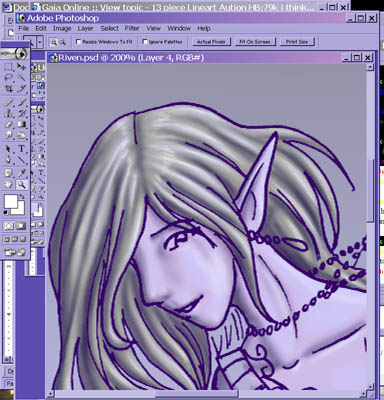 |
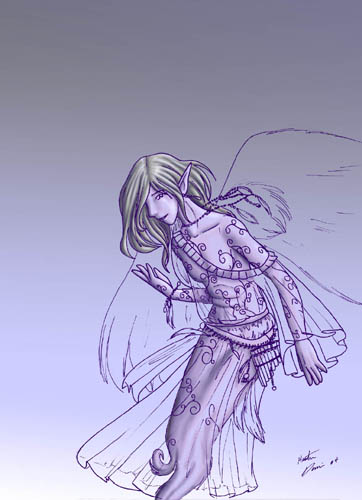 |
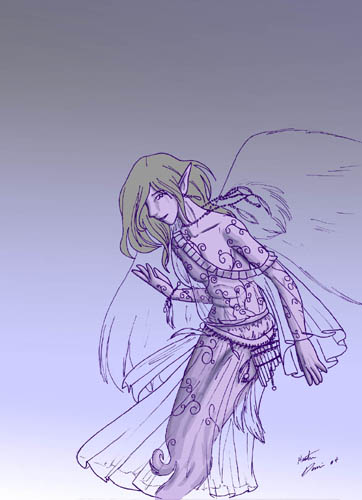
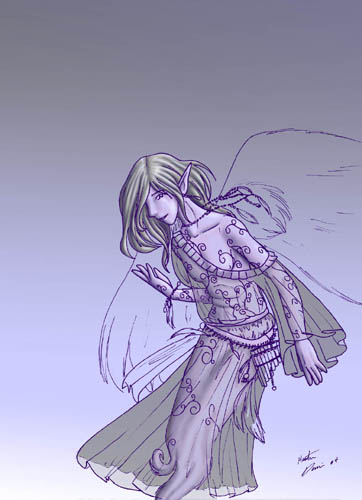
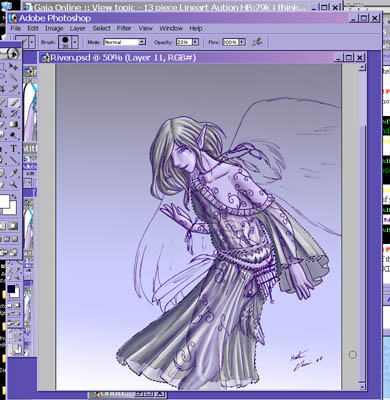
So this is what we have so far. Now on to the outfit. Normal outfits I would just say to simply do the same thing that you did for the skin and just pay attention to the texture and movement of the outfit. You already know how to follow the directions of the fabric. To handle different textures just adjust your brush or mess with different brushes and try different strokes and stroke lengths. :3 Trial and error is one of the best ways to learn how to textures. For this picture we have a see through fabric. :3 First start with the back and place down a large sheet of color for what you see to be the main color. Afterwards adjust the opagancy on that layer. (hopefully you can see that in the screens shot. ) for this image the opagancy on that layer was moved to 54%. Note: you can still fully color on this layer :3 however from here until you return the opagancy to 100% anything on that layer will be at 54%. |
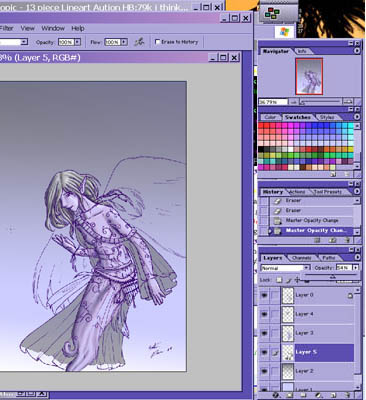 |
|
Do the same thing with a layer above the skin
layer.
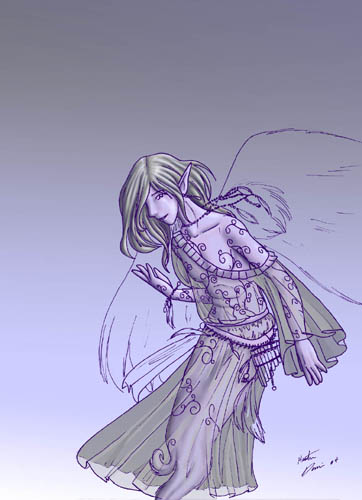
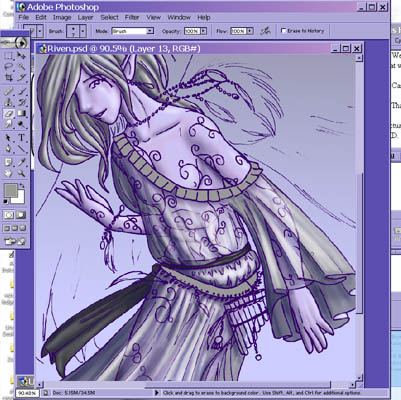
Afterwards on a different layer or two created other low opagancy areas to represent the fabric folding in on itself. Now go to one of those layers that you first created to show that area and with the wand tool try to grab all the areas Note: if the tool is being a pain and not grabbing more than one area go to the top and select one of the other boxes :3 Those boxes tell it how to operate. If you want I suggest playing around with this to learn how it operates.
|
 |
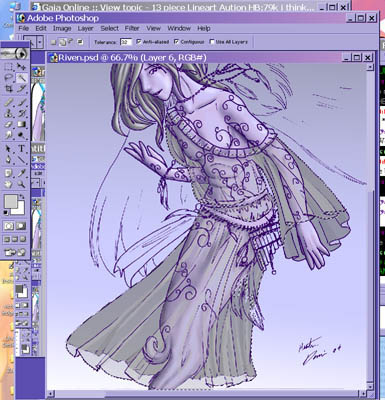 |
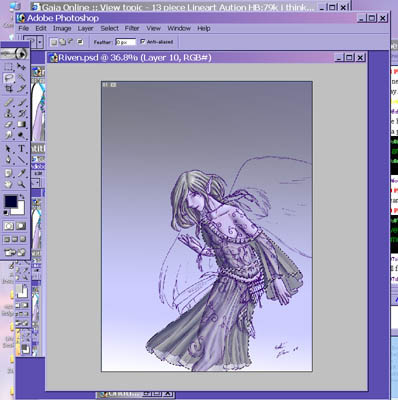
With this tool you can move to different
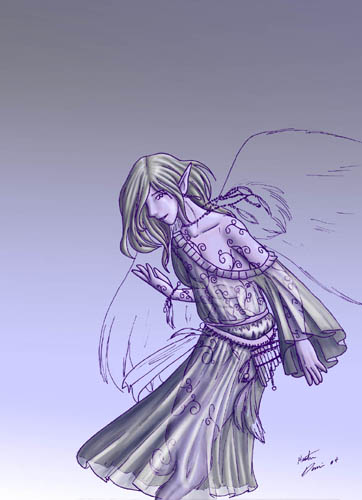
layers and in any of those layers you can ONLY color in the area With this said.. Have fun with highlighting and shading ^o^ You may wish to do them on another layer so that their full color can show up. Afterwards simply use the smudge tool to smooth out areas. Interesting tip: don't be afraid to put layers above your lineart layer. :3 sometimes it can really add to an image. Just be careful when they are up there. :D |
 |
 |
 |
 |
The wings
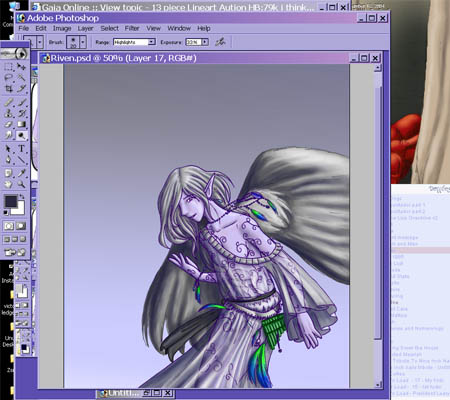
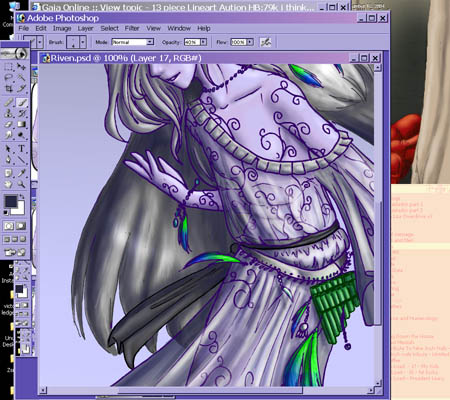
For coloring this area it is similar to the skin. :3 however there is much more emphasis on the way your brush moves.
Create the areas you want for the deepest shadows then start to play round with the highlights.
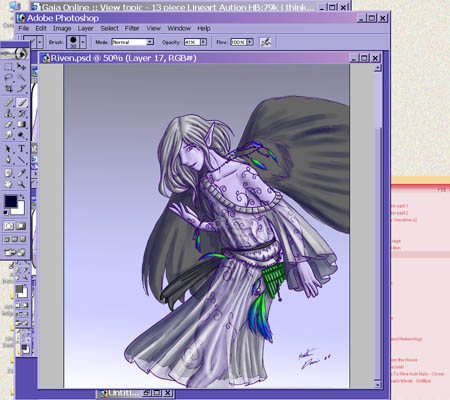
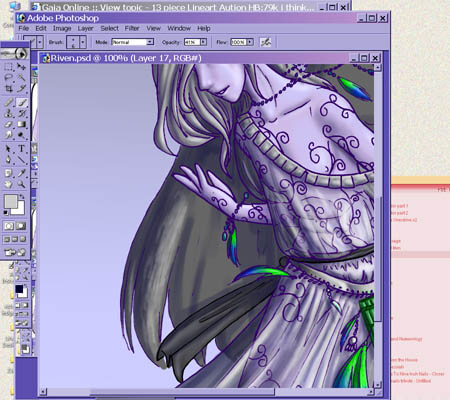
Afterwards you can use the smudge tool in small amounts and go back in to add additional details to bring out the fluffiness of the wings. :3 These wings are organic in nature so you don't need to worry about putting shadows and highlights in the exact right spot. Keep them in the general area and add a few extra wherever it suites your fancy.
Afterwards if you want you can use the burn and dodge tool to add more flare to the wings.
CLOUDS:
This uses a completely different method of coloring :3 Here is the details of how to do it.
first create a new layer under all the character's layers. and then create with a brush on a low opagancy the general base for your picture. :3 Be sure that this color is the darkest or close to darkest color you want these clouds to be.
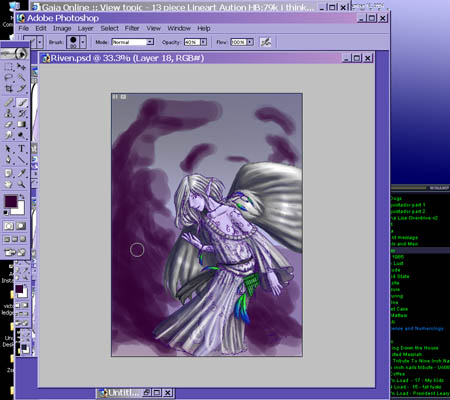 Don't worry about making it look pretty yet XP go for messy.
As long as it is in the right areas it works.
Now then.. with your amorphous blob in the background you add a layer of color on top of it. :3 This layer shouldn't be too bright.. just what you feel the middtones for the cloud should be. Add them where you think the highlights will go.
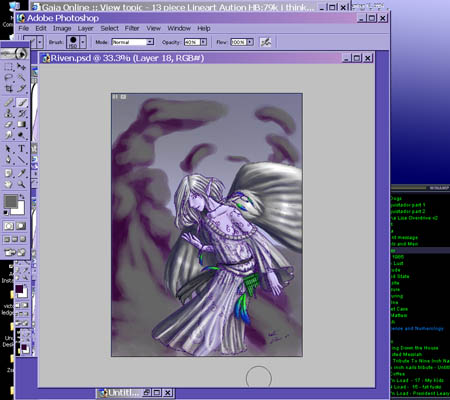
Now step back and look at your cloud. :3 After studying it for a bit get a lighter color and start to add highlights to it. Try to work with the cloud if you can and don't worry about being overly neat. Just make sure the brush is smaller than the other brushes you used and go to town. ^^
General rule. Try to make your brush follow the movements of the cloud :3
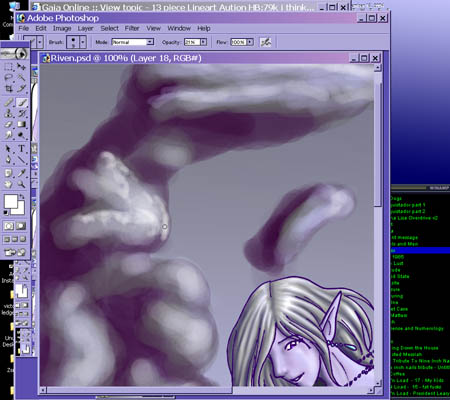
Feel free to add as many highlights as you want to this cloud XP. And don't worry about how pretty it looks when you start on it. Eventually it will look how you want it to :3 Just work with it.
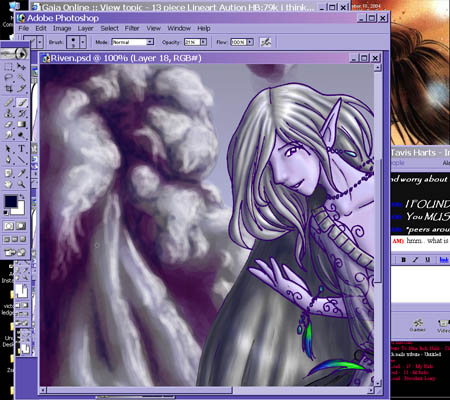 Continue to mess with it.. add highlights where you think you want them and feel
free to add deeper shadows in some areas. :3
You can play around with your cloud. Mess with gaussian blur, mess with motion blur, mess with the smudge tool Just go to town on the cloud. :D
Eventually you will make a masterpiece cloud. ^_^
Note: ~_^ you don't have to use this cloud method on just clouds. If you wish to do an entire picture with it go ahead :D It's a fun coloring method.
And that is pretty much it for this picture tutorial @-@ hopefully the next one I make will be better *waves to everyone*
PS. if there is a part of this tutorial that doesn't work or isn't clear please e-mail me at tavis@kamiki.net so that I can correct it :3.
- Tavis Harts